3. Basic recording and loop recording
hotkeys used in this post
| recording | ||
|---|---|---|
| 3 numpad or f12 | start recording | |
| ALT + L or 5 numpad | loop recording mode | |
| ALT + SHIFT + P or 6 numpad | punch recording mode |
| Arming | ||
|---|---|---|
| ALT + R | arm all tracks | |
| SHIFT + R | create different type of tracks |
| Recording Workflow:** | ||
|---|---|---|
| CMD + . | delete all previous takes (in loop record) |
Basic recording tips
After you’ve armed one or more tracks you can start recording by pressing:
- 3 numpad.
- f12 = (use fN + f12 or change OS X settings)
- CMD + SPACE. (by default reserved for OS X spotlight)
Record Mode:
You can either change the record mode by right click the record knob or:
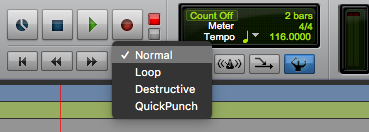
- 5 numpad = loop record
- 6 numpad = quickpunch
- 8 numpad = pre-count on/off (you can change the amount of bars in the midi transport)
Loop Recording
You can loop record by pressing ALT + L or 6 numpad.
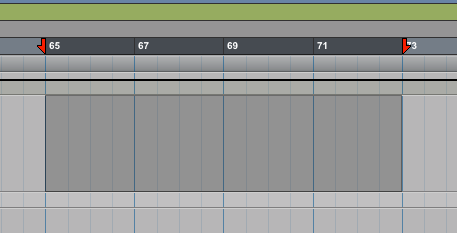
Make sure you’ve selected a few bars and you’re ready to record.
- Tip 1: If you’re recording and cancel the recording before the 2nd half of the loop, PT will automatically delete it.
- Tip 2: Pressing CMD + . will delete all the takes you just did.
Choosing between different takes
Once you’re done recording you’ll only see the last take you recorded in your arrangement window. If you want to choose one of the other takes we can right click on the audio file and go to: matching alternates. Let’s first change our matching criteria so that only the takes we just recorded appear in the list.
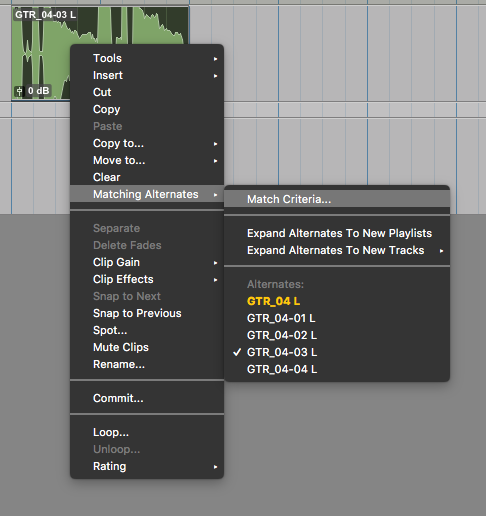
Doing so will open up the following window:
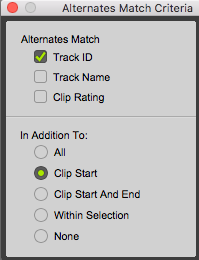
I like to set these settings to Track ID and Clip Start so that I’ll only see clips that have the same name and starting point as the clip I just selected. Which basically means I will only see the takes I have just recorded. After you’ve selected your matching criteria, you can select the take you like from the list.
This is the end of this post, click here for the next one and here for the previous post!