1. Making a new project and creating tracks
In this series of articles named Road to Pro Tools we’ll explore Avid’s ProTools. The Road to Pro Tools is written for users that have experience using other DAW’s but want or perhaps need to learn how to work with Pro Tools. This means that I will not go in too much detail when it comes to basic terminology and ideas. A very handy overview of all the hotkeys that we will be using can be found here. So without further or do lets get started.
hotkeys used in this post
| creating tracks | ||
|---|---|---|
| cmd + shift + N | create new track(s) | |
| ↑ or ↓ | create more tracks | |
| cmd + ← or → | mono/stereo | |
| cmd + ↑ or ↓ | change track type | |
| cmd + shift + ↑ or ↓** | create different type of tracks |
| cmd + enter | rename next track (when renaming tracks) |
Opening up Pro Tools
The first time you open up Pro Tools (PT) you’re faced with this window:
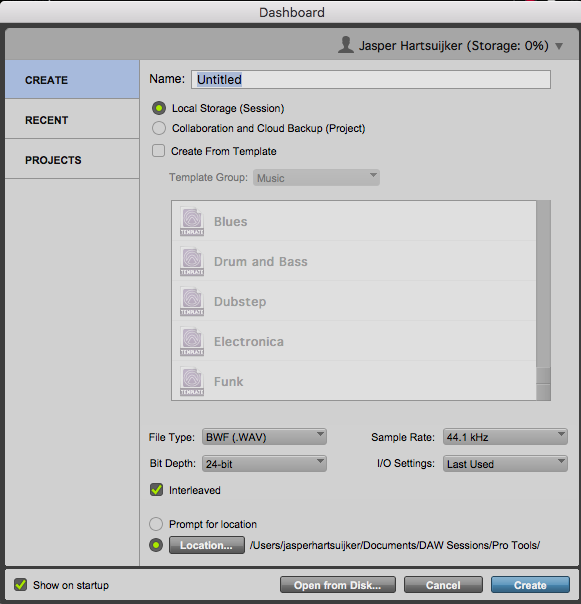
- Save Projects First: Where in other DAW’s you can just start creating from the moment you open up the DAW and save afterwards. In PT you first need to save a new project before you can start working.
- Interleaved: If you uncheck this PT will split stereo files into two mono files. I like to leave this option on so that I can manually decide to split a stereo file into two.
Creating tracks
Unfortunately you’re not able to map your own hotkeys in Pro Tools. Therefore we will have to get used to ProTools’s own hotkeys. Let’s start with creating some tracks. You can create all sorts of tracks by using the hotkey: CMD + SHIFT + N.

You can manually change the track type from Audio Track to Aux Track, but it’s faster to do this using hotkeys. You can do this as follows:
Hotkeys:
- Amount of tracks: With the ↑ or ↓ you can create more tracks. You can also just type in a specific number
- Mono or Stereo: Use the CMD + ← or → to switch between mono or stereo. (Pro Tools ultimate users will have more options)
- Track type: Use the CMD + ↑ or ↓ to change the track type.
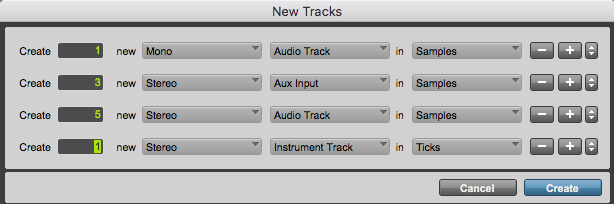
- Different type of tracks: With the CMD + SHIFT + ↑ or ↓ you can create different type of tracks. (see image above)
Changing the menus
You can change most of the menus by right clicking on them. This will open up this window:
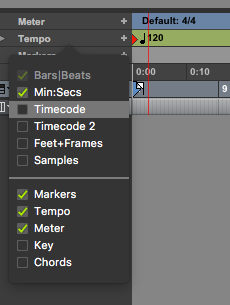
Since I’m easily distracted I like to hide everything I don’t need. You can hide things such as the timecode by holding ALT + clicking on it. Simply clicking and holding your mouse button allows you to move things such as the transport bar around.
Tip: If you’re trying to hide something e.g. the timecode by alt clicking on it and it won’t go away, it’s probably because you have selected it. Just select something else with your left mouse button, like the markers for example and then alt click the timecode.
Renaming tracks
Double clicking on a track’s name will allow you to rename the track (there’s no hotkey for doing this). When you quickly need to rename a couple of tracks; e.g. when you have a couple of drum tracks, you can use the hotkey: CMD + ENTER which will automatically open the rename window for the next track.
So if you want to rename 6 drum tracks you can click on the first track which will open up the rename window. Next you type in the new name of this track, for example ‘KICK IN’. And without clicking anything you use the hotkey: CMD + ENTER and the rename window of the next window will automatically open.
This is the end of this post, click here for the next one!